AutoMailer is a cold email automation platform that gives you every tool you need to run successful cold email campaigns in one place. This guide walks you through setting up your account, preparing your sending infrastructure, creating your first campaign, and launching it the right way.
Dashboard Overview
When you log into AutoMailer, you land on your main dashboard. This page gives you an at-a-glance summary of your account, campaign activity, and performance.
Your dashboard shows:
- Account details: your current plan, usage limits, and available features.
- Campaign performance graph: tracks total emails sent, open rate, reply rate, and bounce rate.
- Recent campaign log: your latest activity including recent sends, updates, and performance changes.
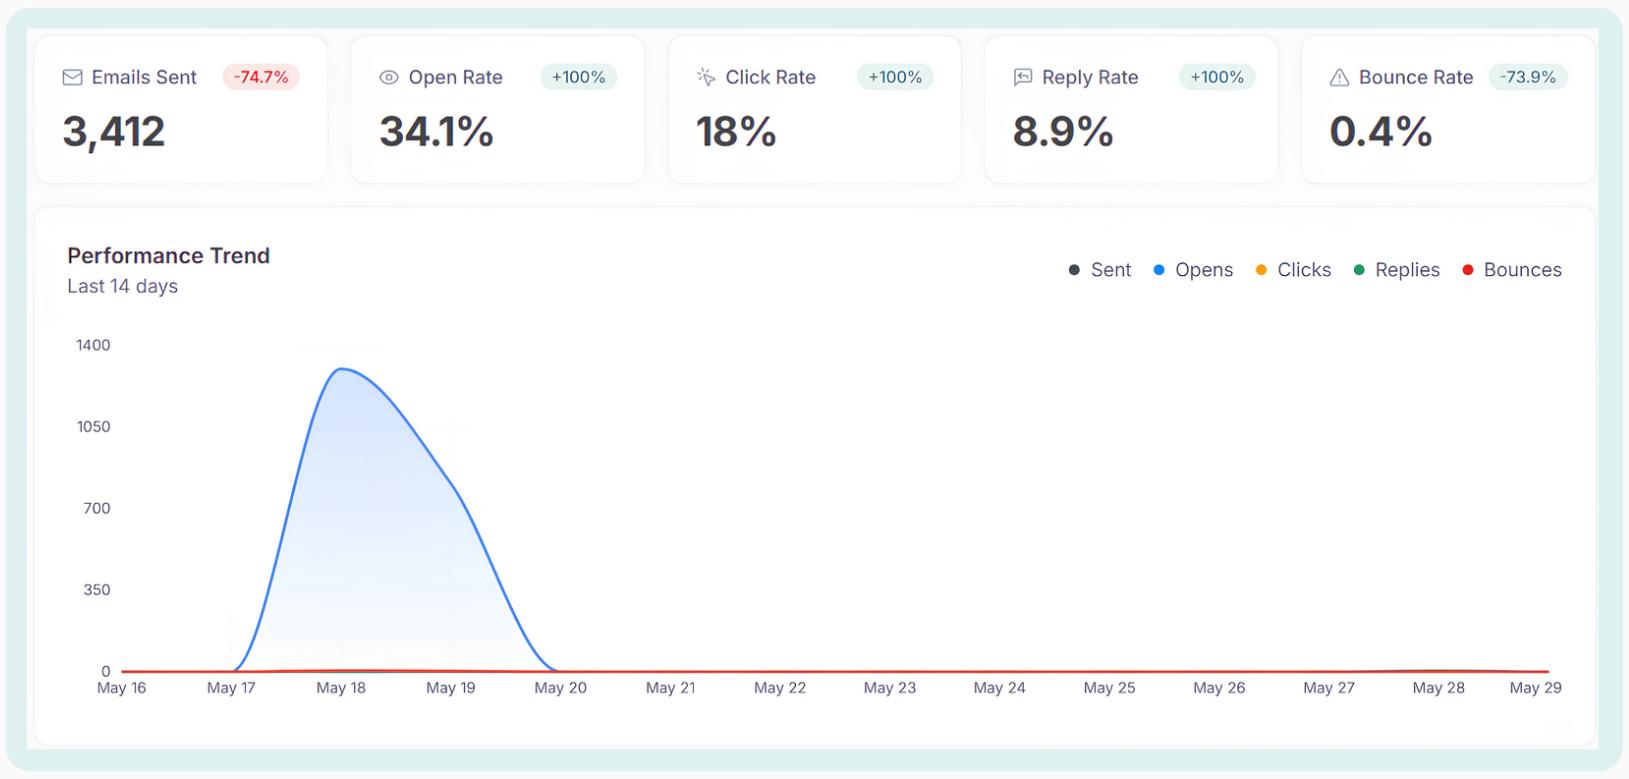
The dashboard is designed to help you quickly understand how your campaigns are performing and where your account stands before creating or managing campaigns.
1Set Up Your Mailbox
The first step is connecting your mailbox to AutoMailer. This happens on the Email Accounts page, where every mailbox is managed and controlled.
The Email Accounts page gives you an overview of your send infrastructure and shows:
- Connected mailboxes
- Mailboxes currently in use
- Mailboxes with errors
- Mailboxes warming up
This helps you quickly understand whether your sending accounts are ready to use before launching a campaign.
If you already have a mailbox
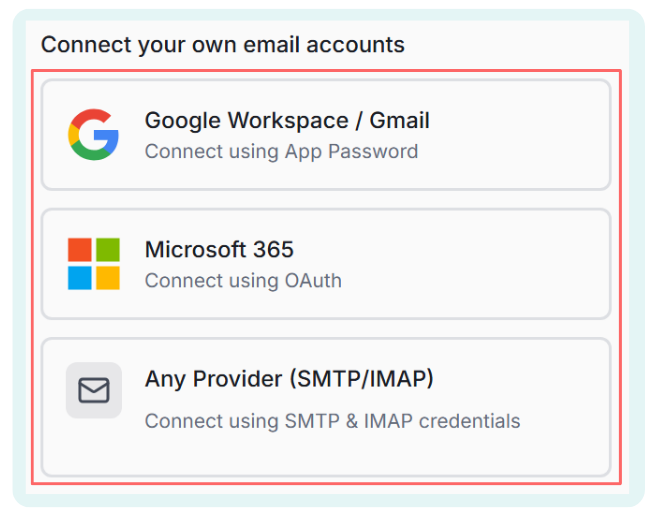
You can connect it directly to AutoMailer on the Email Accounts page. To add a mailbox:
- Click Add New Account
- Choose your email provider
- Follow the connection steps
Once connected, AutoMailer shows useful information about your domain and mailbox setup:
- Status: current activity (warming, in-use, idle)
- Campaign EPD: daily send volume for your campaign
- Warmup EPD: daily send volume for warmup
- Mailbox health: overall health of your mailbox and domain
- DNS records: domain authentication protocol setup (SPF, DKIM, DMARC, MX)
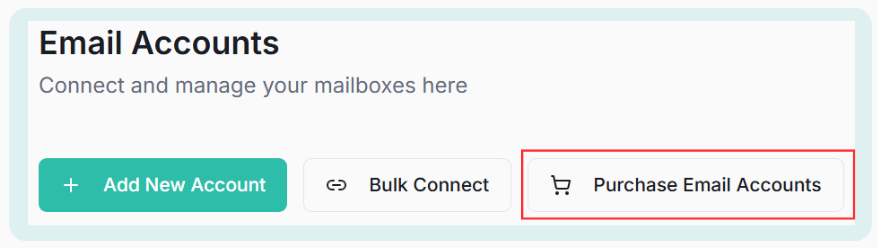
If you don't have a mailbox
You can purchase and set up one directly inside AutoMailer. Click the Purchase Email Accounts button and follow the setup instructions. This lets you get your sending infrastructure ready without dealing with the technical setup or managing a separate tool.
If you're brand new to cold email, the done-for-you path gets you sending faster and avoids the most common setup mistakes. Learn more about DFY infrastructure →
2Enable Warmup
Email warmup helps improve your sender reputation before and during cold outreach. To enable warmup, simply turn the warmup toggle ON.

AutoMailer has preset warmup settings optimized for the best possible outcome, but you can customize your warmup activity by clicking the three dots.

From there you can:
- Adjust your warmup daily send limit
- Enable or disable Ramp-up
- Adjust your response rate
If you're new to cold email marketing, we recommend letting the system use its preloaded settings. They're tuned for the safest path to a strong sender reputation.
3Add Your Contacts
Adding your contacts is the next step. Navigate to the Contacts tab and click on My Lists.
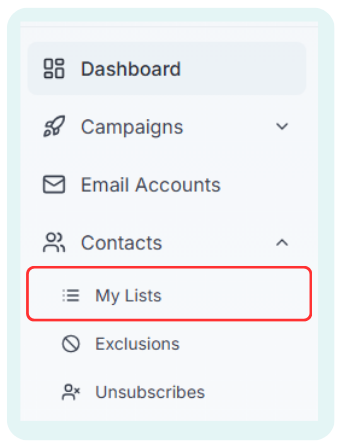
Like the Email Accounts page, the My Lists page gives you an overview of all the data you have added to your account:
- Total contacts uploaded
- Email verification credits remaining
- Verified contacts
- Unverified and invalid contacts
If you have your list ready
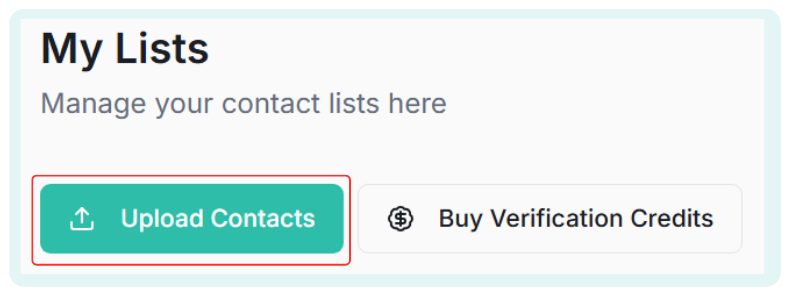
Upload it as a CSV file. To upload your list:
- Click the Upload Contacts button
- Name your list and drag and drop your CSV into the uploader
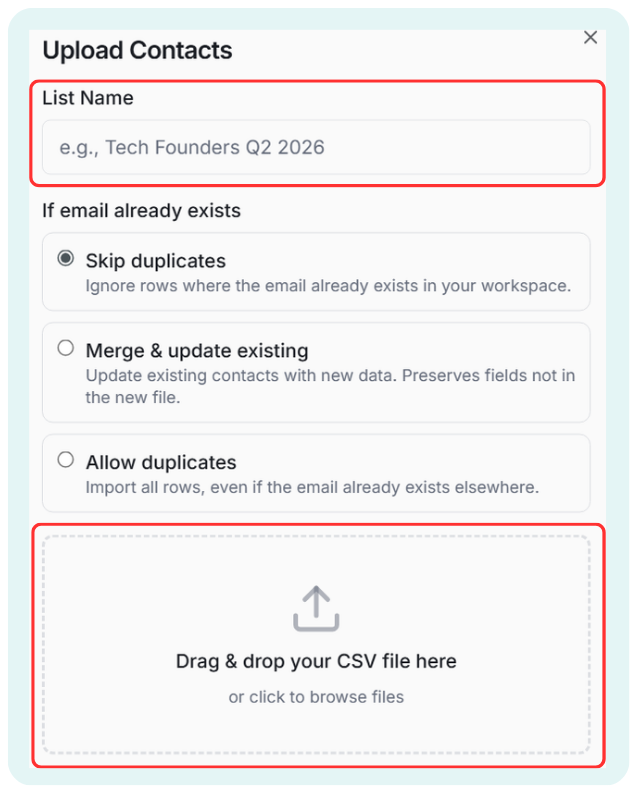
The list uploader also has useful tools:
- Allow duplicate contacts
- Merge with an existing list
- Remove duplicates
Select what fits your needs.
If you don't have a list
Use your Lead Finder credits to build one. Navigate to the Lead Finder page, search based on your target market, industry, role, location, or other filters, and get your campaign data ready. See how Lead Finder works →
4Verify Your Contact List
Once your contact list is added, the next step is to run email verification on it.
Email verification helps reduce:
- Bounces
- Invalid emails
- Poor deliverability
- Damage to your sender reputation
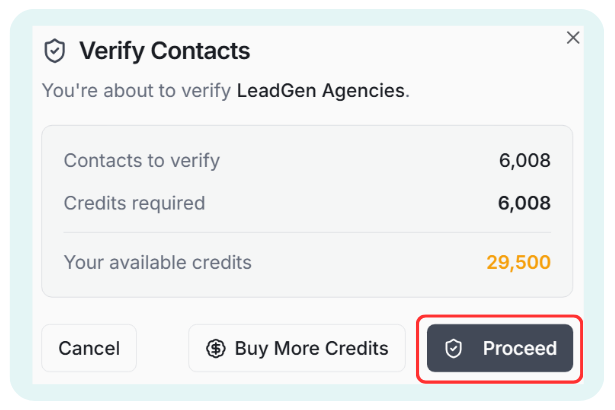
To verify contacts:
- Select the list you want to verify
- Click the Verify button when it becomes available
- Run email verification
You can also click the three dots on a list to access the email verification option.
5Create Your Campaign
Once your email accounts have been warmed up and your lists have been verified, you're ready to launch your campaign. Navigate to the Campaigns tab and click Create Campaign.
Creating a campaign happens in three phases. Each phase is covered below.
Phase 1: Initial Campaign Settings
The first phase is the initial campaign settings. Fill in all four fields:
- Campaign name: name your campaign (only you can see this).
- Select contact list: the list to be used for this campaign.
- Select accounts: the mailbox that will be used to send this campaign.
- Forward replies: the inbox where you want replies forwarded.

Once all fields are populated, click Next Step to move on to Phase 2.
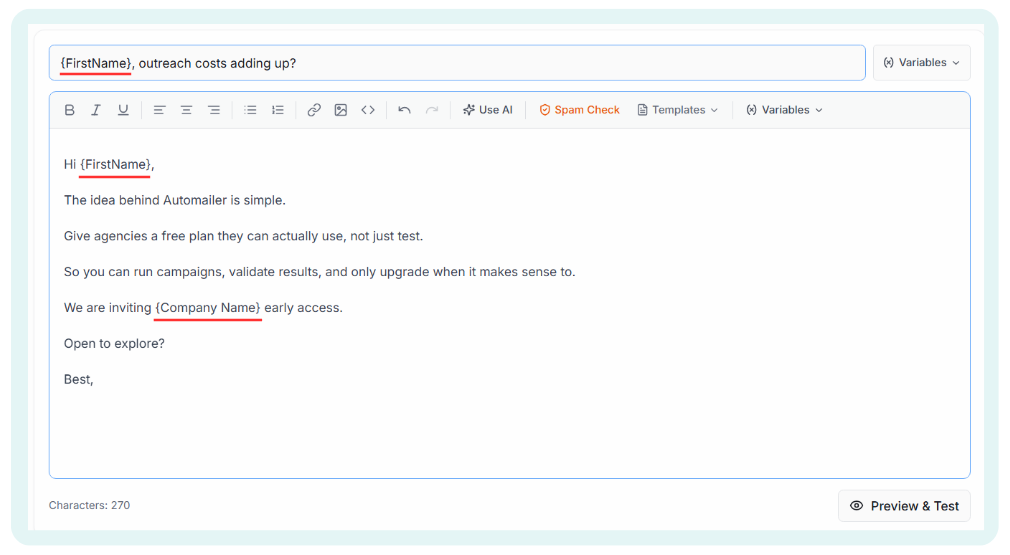
Phase 2A: Writing Your Email Sequence
The second phase is creating the email sequence your list will receive. This is where you add the subject line and the body of your email.
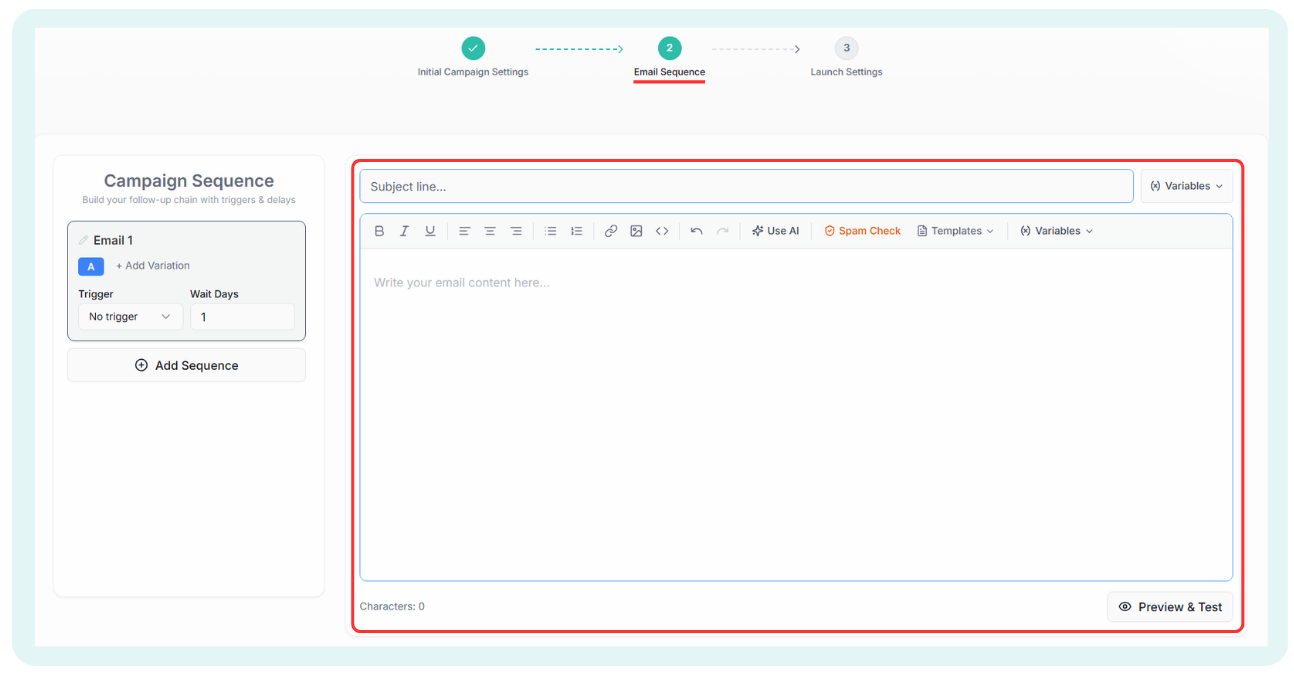
When creating your sequence, use the Variables option in both the subject line and the email body. This pulls data from your contact list into the email as personalization tokens, which significantly improves performance.
Best practices for your first email
- Keep the first email under 125 words
- Personalize the opening line when possible
- Focus on one clear problem or benefit
- Avoid spammy words and heavy formatting
- Use plain text when possible
- Include one simple call-to-action
Example call-to-actions that work: "Worth a quick look?" or "Open to seeing how it works?" Make it easy for your prospect to engage with you.
Always preview your emails to make sure variables are working correctly. Click the Preview & Test button to verify everything is loading properly.
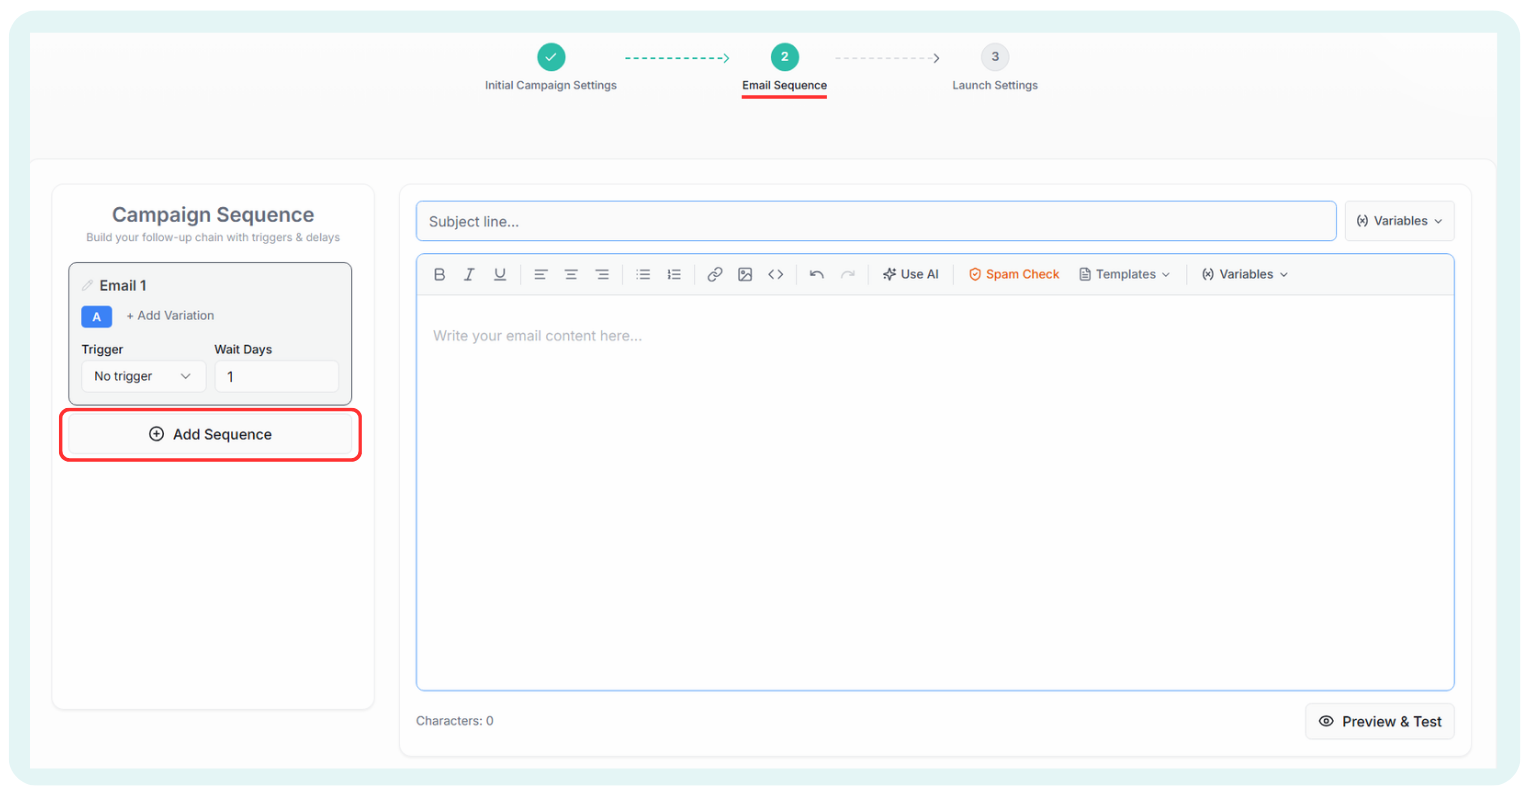
Phase 2B: Campaign Sequencing
A simple but effective cold email sequence usually includes:
- Email 1: initial outreach
- Email 2: first follow-up
- Email 3: final follow-up (break-up email)
To add a step to your sequence, click Add Sequence.
Keep your emails short, clear, and focused on the prospect, and add spacing between each email in your sequence.
Example timing:
- Email 1: Day 1
- Email 2: Wait 3 days
- Email 3: Wait 2 days
AutoMailer's A/B test feature lets you test different variations of an email and see what works best for your audience. Click Add Variation in the email sequencer to add variations to your message.
Phase 3: Campaign Launch Settings
You are now at the final phase of your campaign. Finalize your launch with these important settings:
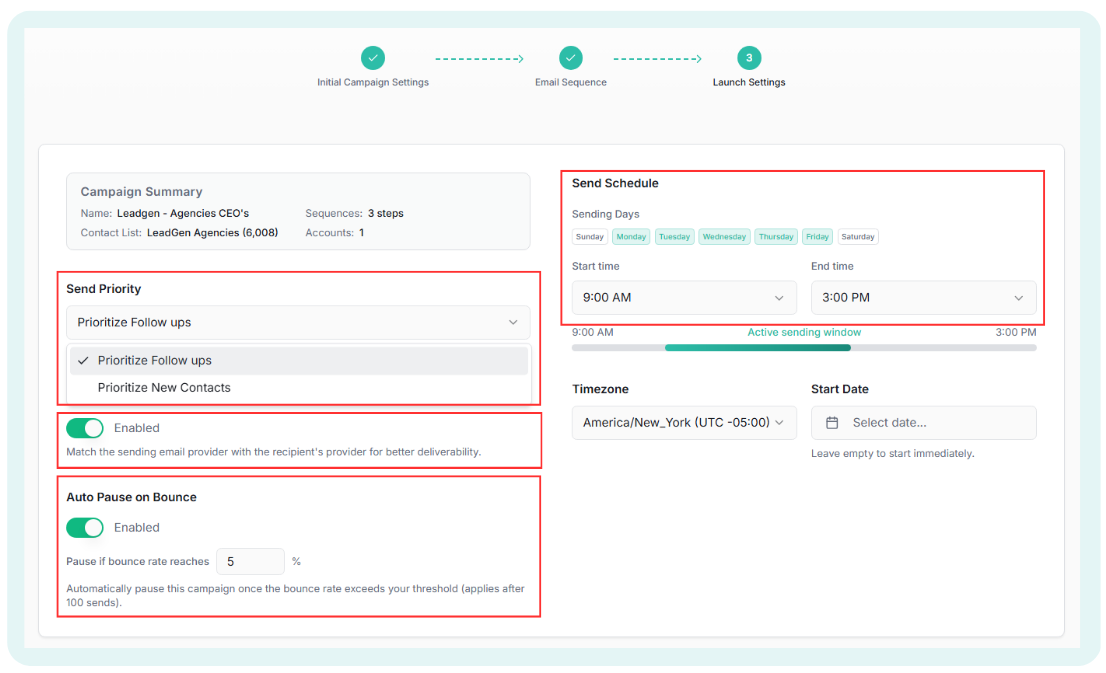
- Send Priority: choose whether AutoMailer prioritizes follow-ups (sending sequences) or new contacts (initial emails). This matters because of the daily send limit per mailbox.
- ESP Matching: matches your mailbox ESP to your prospects. If your sending mailbox is Google Workspace, AutoMailer identifies Google Workspace recipients in your list and uses only Google Workspace to send to them. Useful when you use different ESPs as your sending mailboxes.
- Auto Pause on Bounce: set a bounce threshold for your campaign. If the campaign hits the threshold, AutoMailer automatically pauses it, protecting your mailbox reputation.
- Sending Schedule: choose the days and times your campaign runs. For B2B cold email, weekdays during business hours usually work best.
6Review Before Launching
Before turning your campaign on, review everything carefully. Use this checklist:
- Sending accounts (mailboxes) selected have no errors and have been warming for at least 14 days
- Campaign list selected is correct and has been verified
- Email copy is reviewed
- Personalization and A/B variables are working
- Campaign sequence timing is set
- Sending schedule is set
- Final launch settings are configured (ESP matching, bounce protection)
7Launch Your Campaign
Once everything looks good, launch your campaign. AutoMailer will begin sending based on your campaign settings, schedule, and limits.
Do not make major changes immediately after launching. Let the campaign run long enough to collect useful data before tweaking anything.
8Monitor Replies and Performance
After your campaign is live, monitor performance on the View All Campaigns page. Pay attention to:
- Open rates
- Reply rates
- Bounce rates
- Positive replies
- Unsubscribes
- Sending errors
- Inbox replies
Use the unified inbox to manage conversations and respond to prospects directly.
Recommended First Campaign Setup
For your first campaign, we recommend starting simple:
- 1 target audience
- 1 offer
- 3 to 4 email steps
- Short plain-text emails
- Low daily sending volume
- Verified contacts only
- Warmed-up inboxes
Once you see what is working, you can scale up gradually. Always base your scaling and optimization decisions on real campaign data.
Common Mistakes to Avoid
Avoid these when launching your first campaign:
- Sending too many emails too quickly
- Using brand-new inboxes with no warmup
- Uploading unverified lists
- Writing long, overly salesy emails
- Adding too many links or images
- Targeting too broad of an audience
- Forgetting to preview personalization variables
- Continuing to follow up after someone says STOP
Final Launch Checklist
Before you launch, make sure you can answer yes to the following:
- Is my target audience clear?
- Are my contacts verified?
- Are my inboxes connected and warmed up?
- Is my email copy short and easy to understand?
- Are my personalization fields working?
- Are my sending limits and send schedule safe?
- Do I know where to check replies?
Follow this guide and master the fundamentals. Always keep an eye on your campaign data and base your next campaign launch on what you learned. For any technical or deliverability questions, our support team is here to help.